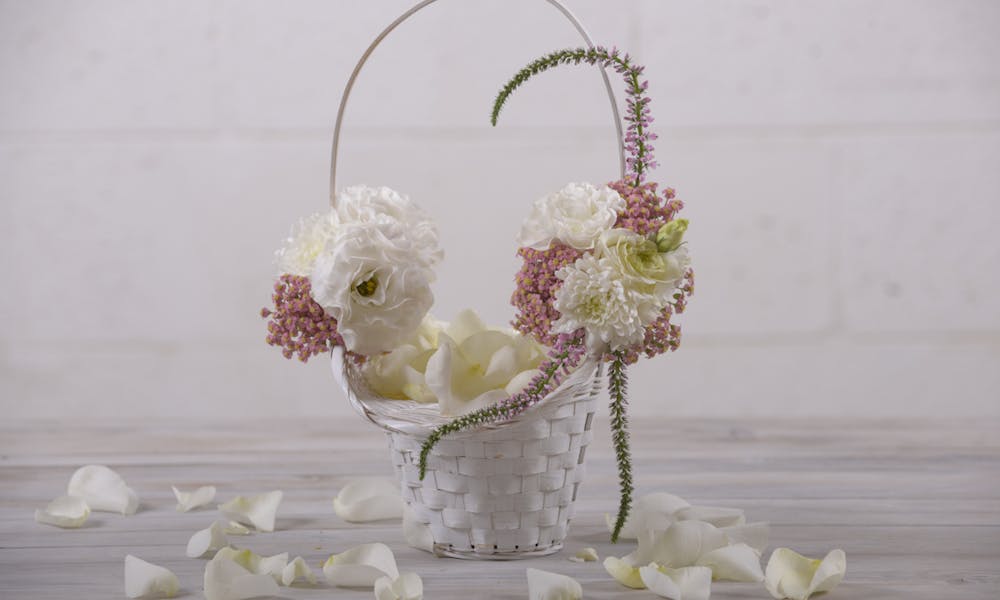
Last week, in the first installment of our Do It Yourself With Flowers series, we showed you how to make a stunning sponge-in-a-box decoration for your home or garden. This time, we’ll show you how to make your own floral wedding basket, perfect for the wedding of any friend or relative!
What do you need?
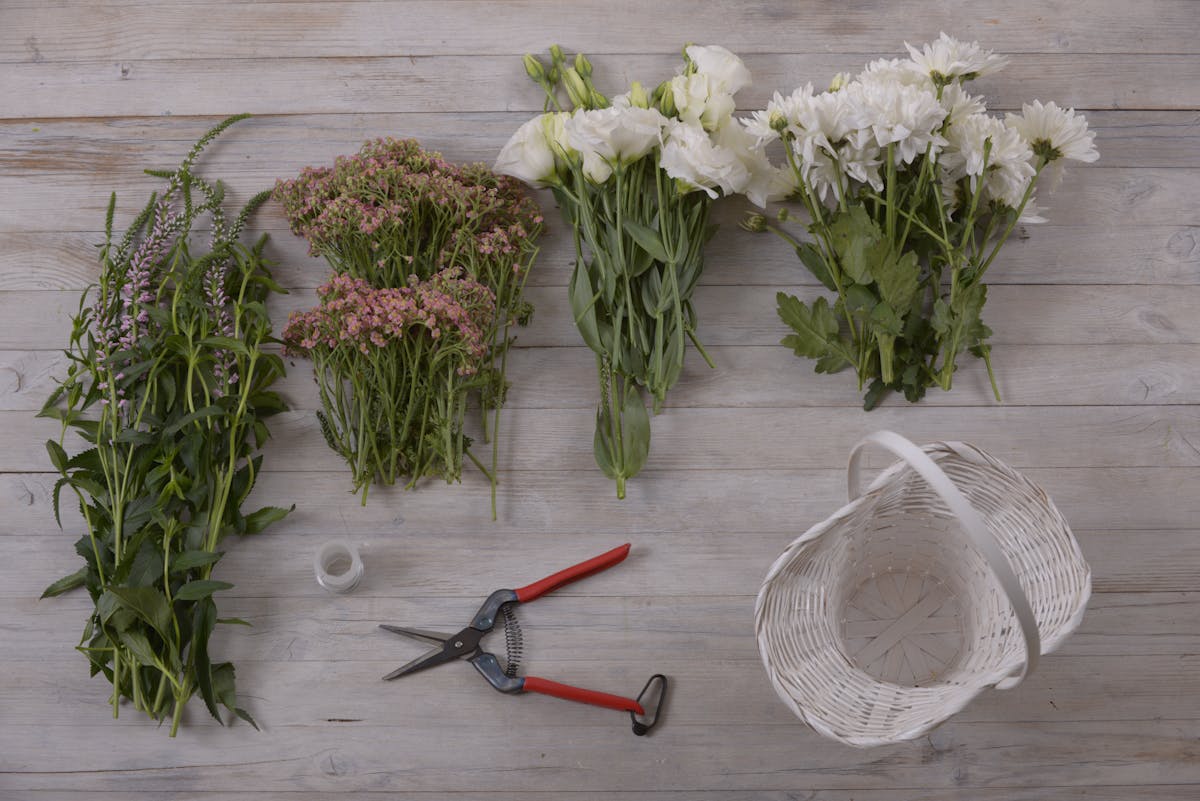
Our suggestions are based on what we’ve used, but of course, you can mix and match to find the perfect creation for you. It might be a good idea to try to match the flowers and basket to the colour scheme of the wedding, or find out what the favourite flowers of the bride are. Just remember, nothing too big! These are our suggestions for the flowers to use:
- Pink yarrow
- Chrysanthemums
- Lisianthus
- Veronica
Of course, you’ll also need some other equipment:
- A wedding basket, or basket of some sort that can use (if you don’t know about a colour scheme, white is always a safe bet)
- Shears (scissors can also do the trick if you don’t have any!)
- Some thin wire for threading everything together
- Satin ribbons to add decoration
Once you’ve got all this, we can get started!
Instructions
Step 1 – Make a mini-bouquet
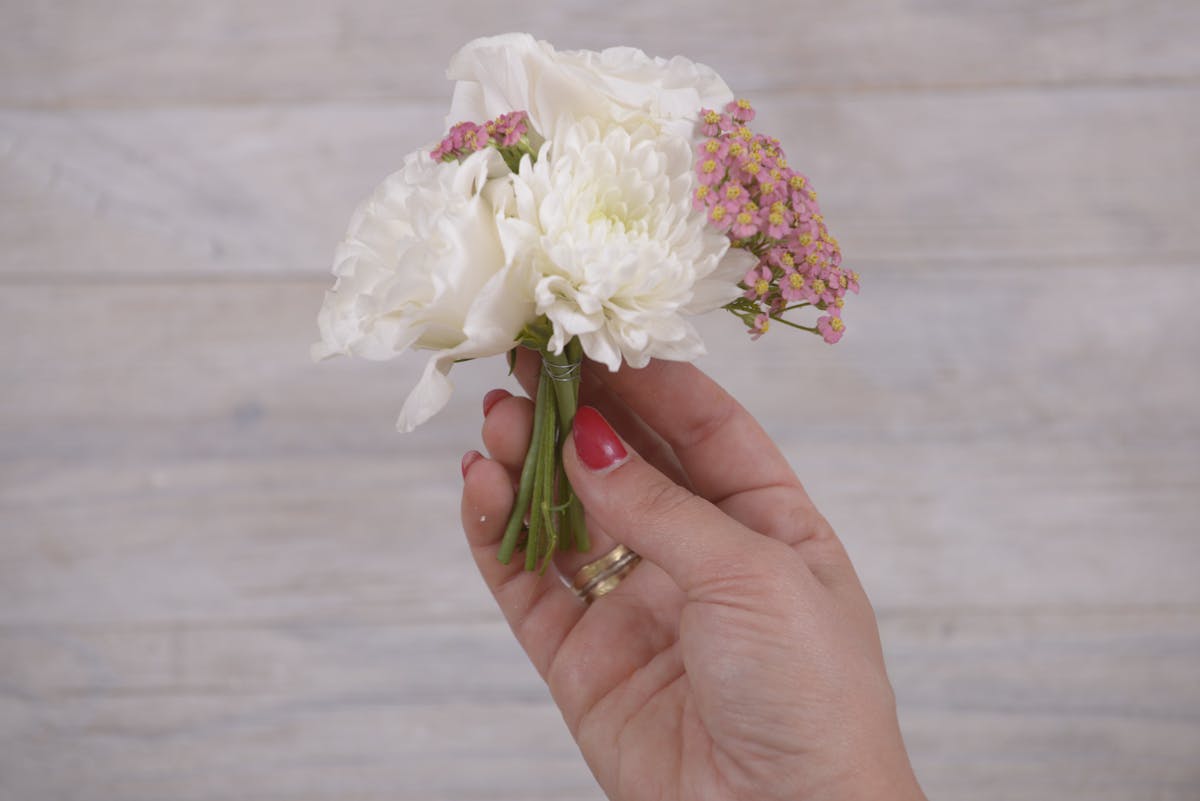
This step is important to make sure that your floral wedding basket looks good! Once you’ve chosen the flowers that you want to use, put them together and make sure that they match and look great. Cut the stems to a short length so that you can make the next steps easier. It’s sure to catch the eye!
Fun fact: The pink yarrow that you can see on the right of this mini-bouquet was a popular vegetable in the 17th century and is still used in some soups.
Step 2 – Prepare the basket with wire
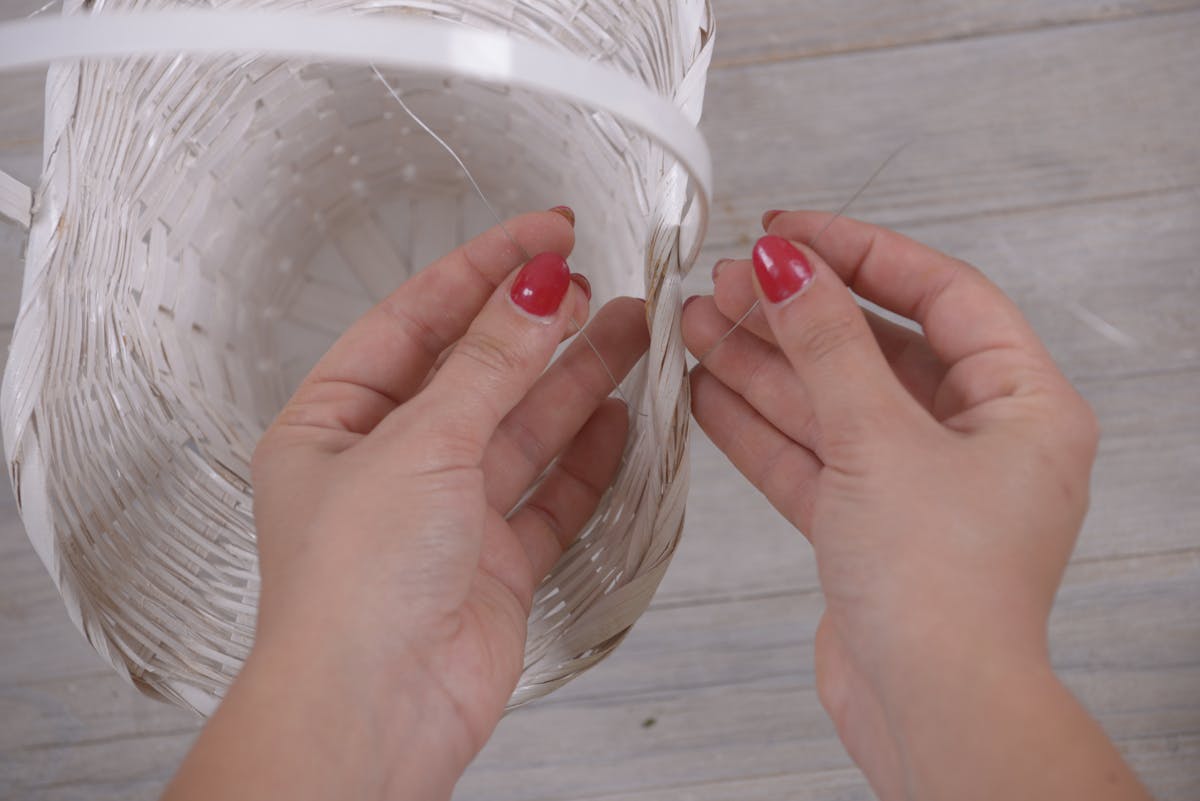
While this can be fiddly, it’s a vital step. Make sure that your wire is thin enough to fit through the fibres of the basket subtly, but strong enough to hold everything in place. Feed the wire in one side and out the other, leaving it open on both ends to put in your mini-bouquet.
It’s best to do this near the handle of the basket, as it gives you a place to tie the flowers around which provides a bit more support and strength, and will ensure that your mini-bouquet doesn’t fall off as it’s paraded down the aisle!
Step 3 – Attach your mini bouquet to the basket
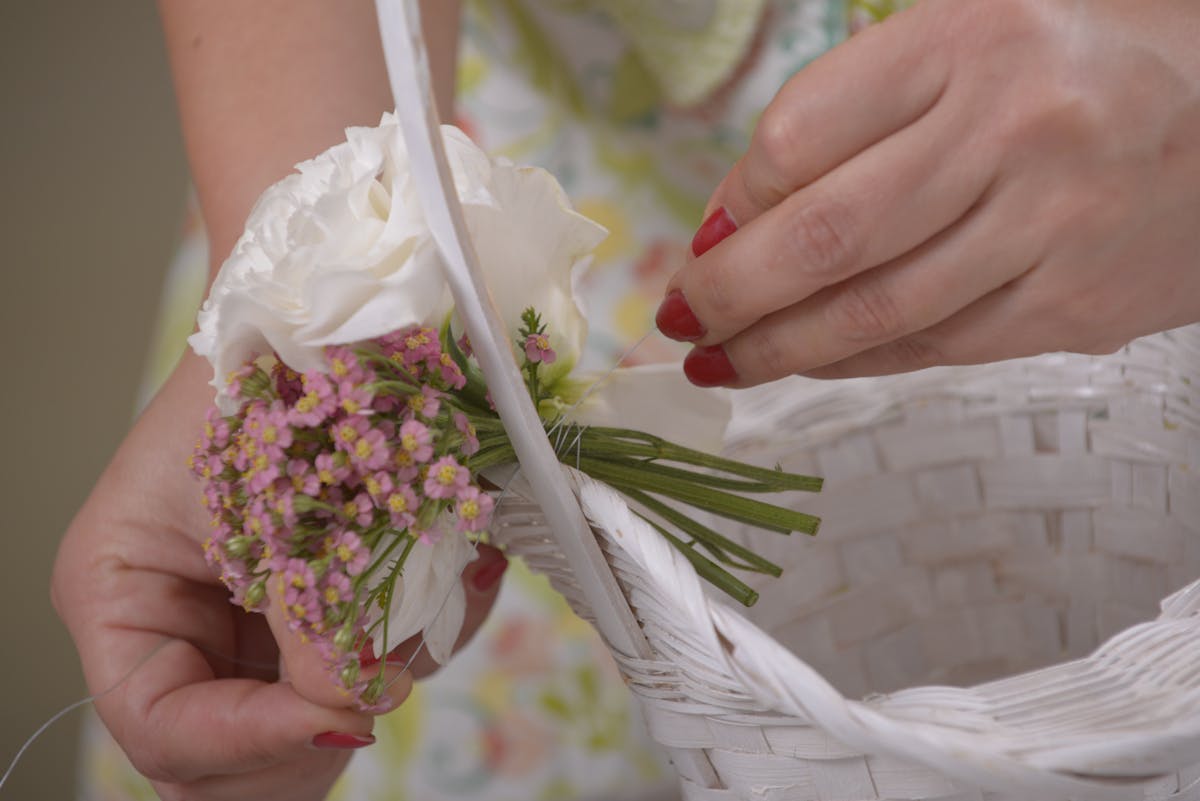
The step where it all comes together! Tie the wire around your mini-bouquet and tie it in a knot to make sure it is secure. It’ll be most secure to wrap it around the mini-bouquet a few times to make sure that it is as strong as possible. If you want, you can always shake the basket a little to ensure that it’s tightly secured, but be careful not to damage the flowers!
Step 4 – Repeat and Fill it with petals
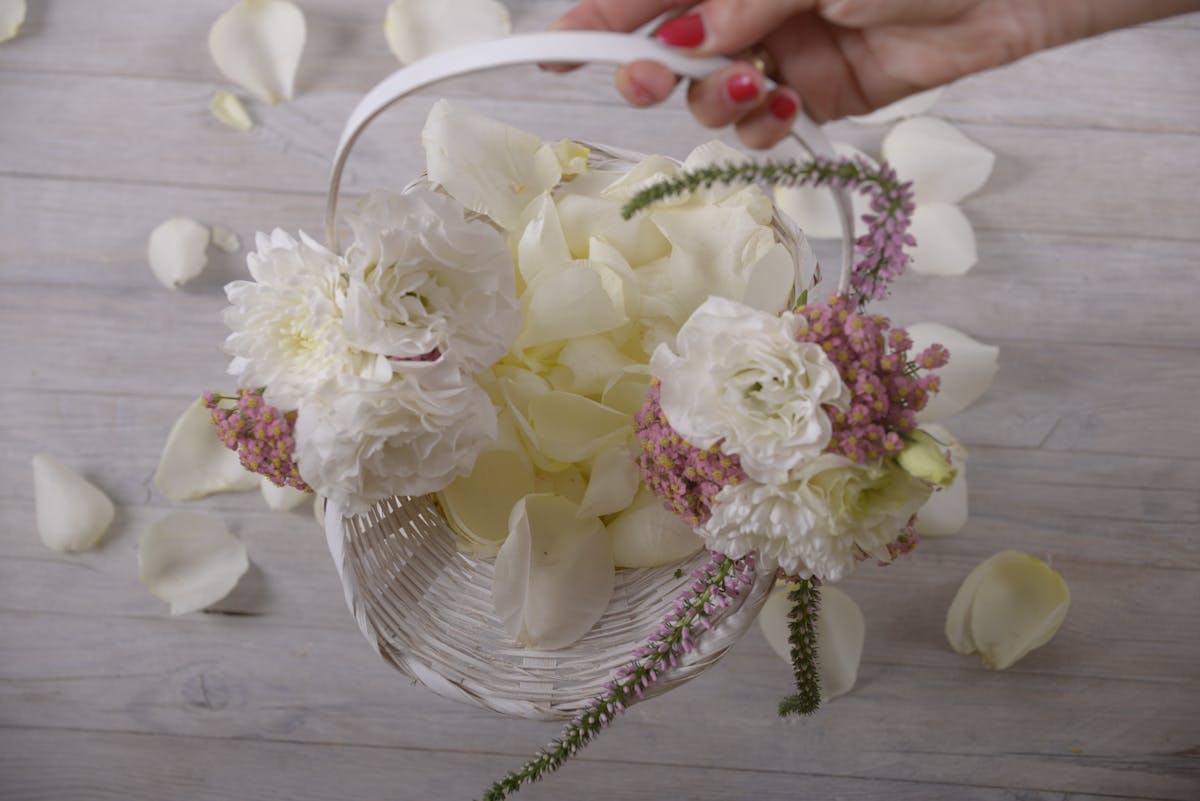
You’ve added one mini-bouquet, but don’t stop there! It will look great if you have two, or even more, mini bouquets. In this case, we’ve gone for an asymmetrical look with all the veronicas on one side, but you could easily make both sides identical. It completely depends what you prefer!
You can’t forget to make sure it works with the petals or confetti or whatever you want inside! White rose petals, like these look especially great at weddings as they symbolise spirituality and new starts.
Fun fact: A species of veronica is featured in the badge of Squadron 541 of the British Royal Air Force.
Step 5 – Take care and enjoy!

Make sure that you look after the flowers in advance and on the day of the wedding, you don’t want them to look battered and bruised! The later you leave to make your floral wedding basket, the fresher they will look. Most importantly of all, enjoy the wedding!
We hope you enjoy making your floral wedding basket and that it looks wonderful on the big day! Why not send us your pictures and photos in the comments below? Come back to our blog for the next installment in our Do It Yourself With Flowers series, where we will be showing you how to make a floral bracelet.
