Welcome back to the latest post in our DIY With Flowers series. We have already shown you how to make a wide range of accessories and decorations, but after you have made your floral bracelets it’s time to reward a lucky man in your life for the special occasion with a boutonnière. Traditionally worn for formal occasions such as proms or weddings, boutonnières can also be worn for any kind of event, or even just because you want to!
History suggests that the roots of the boutonnière go back as far as the Aztec times, when people would wear flowers to support sportsmen and women as they compete, with their flower indicating who they were supporting. They became popular as a wedding and event accessory in the 19th century as wearing flowers was believed to bring good luck as their smells rid any evil spirits or bad luck.
Whilst traditionally worn by men, they can also be worn by women by attaching them to your dress or can be designed to match your corsage if you are going to an event with your partner. This means that the boutonnière is one half of the perfect matching accessory for you and your partner!
What do you need?

In terms of equipment, this DIY With Flowers post is quite simple. We have used and would recommend the following:
- Boutonnière pins (normal pins will do the job perfectly)
- Floral tape
- Shears or scissors
We have used boutonnière pins as they are best for holding your boutonnière in place well without damaging your jacket, but normal pins or clips will be able to do just as good a job.
More importantly, you need some good flowers to make sure that your boutonnière is perfect for the special occasion. The flowers that we have used and would suggest are:
- White rose
- Baby’s breath
- Eucalyptus
- Chlorophytum
However, as always with our DIY With Flowers series, you can adapt and change this to suit your own tastes or the theme of the party, event or wedding. Carnations are also popular flowers when it comes to boutonnières, often chosen for more informal occasions, while roses are considered more formal, so it is entirely down to your preference!
Instructions
Step 1: Choose your focal flower

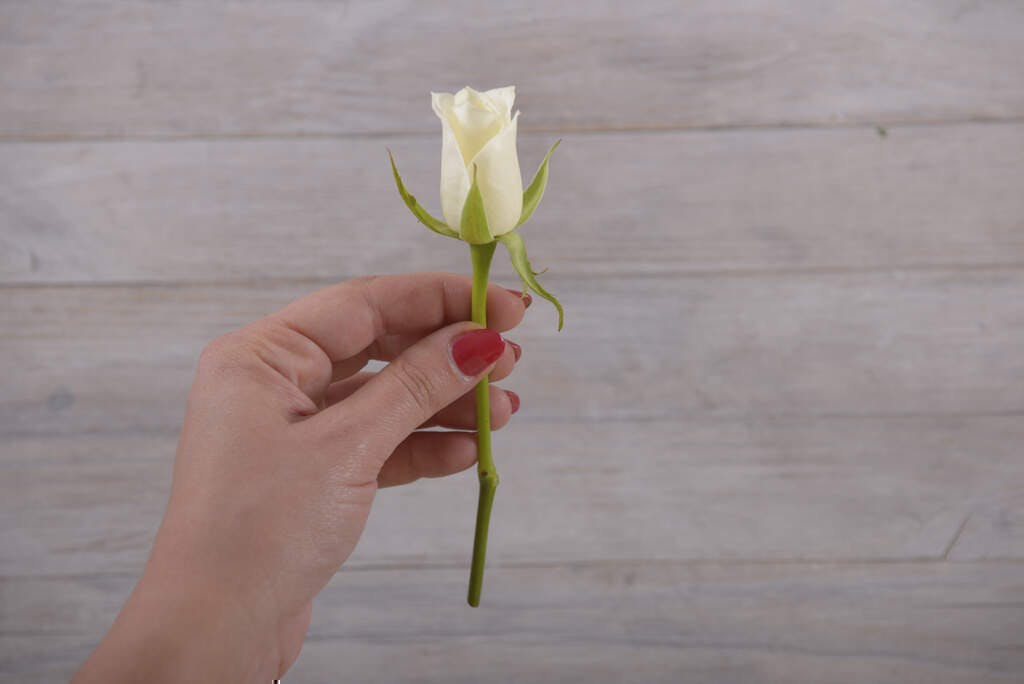
The first step is to choose your focal flower. This will be the main and most visible flower in your boutonnière so is usually the biggest flower. In this example, it is the white rose. Be sure to cut the stem down to a suitable length of a few inches.
Step 2: add other flowers

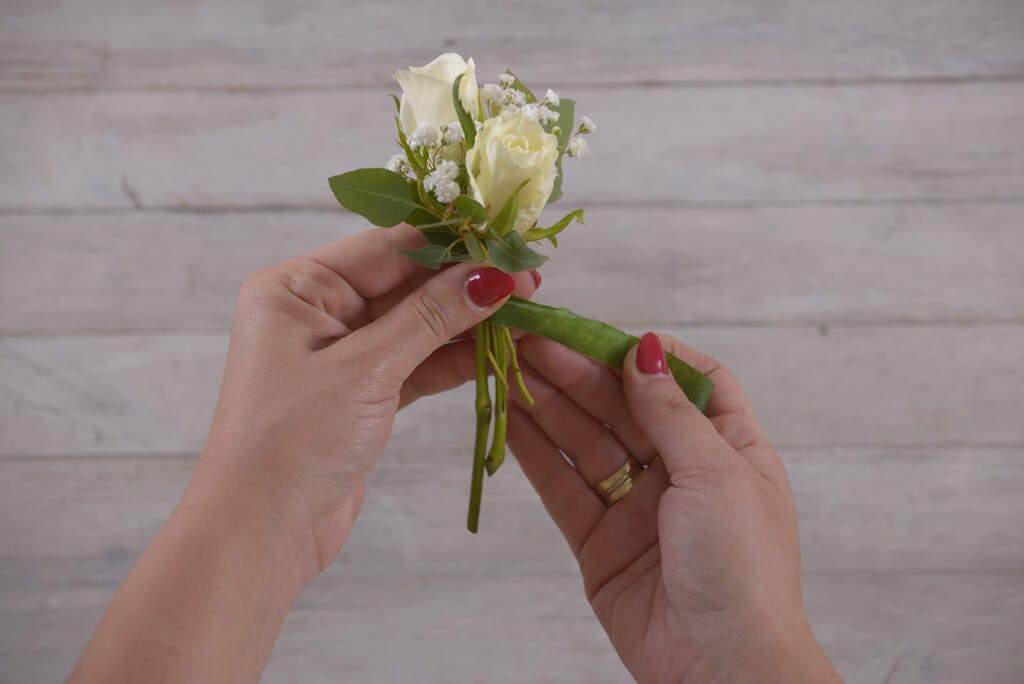
Then add you other flowers to your focal flower. Here we have added baby’s breath and eucalyptus. Try to arrange these evenly so that they are evenly spread and give a feeling that the boutonnière is even and full. Hold all of the flowers together by pinching the top of the stem to hold them in place.
Step 3: wrap them together

Now, from the top down, you can add some floral tape. This will help you to hold them in place and together while you continue with the next steps and also provides a base layer to hold the flowers together when you are done and wear your boutonnière.
Step 4: add greenery

Here we will add some greenery to add some depth to the boutonnière and will help to make sure that it looks professional. We have used chlorophytum and folded in half to give it an impressive sense of style. Then, wrap some floral tape around the bottom of the loop to hold it in place.
Step 5: Cut the stems

You can then cut off the stems a few inches below the loop. This means that you will have enough stem left to attach it to the rest of your boutonnière but not so much that it looks awkward or out of place.
Step 6: Wrap everything together

Next, wrap around the main flowers and your added greenery to tie them all together. As previously, start from the top and work your way down for the best results. Make sure that they are held tightly and close together to stop any of your flowers from coming out of place.
Step 7: Attach to your jacket

The most difficult step of all is attaching your boutonnière to your jacket, so we will talk you through step by step.
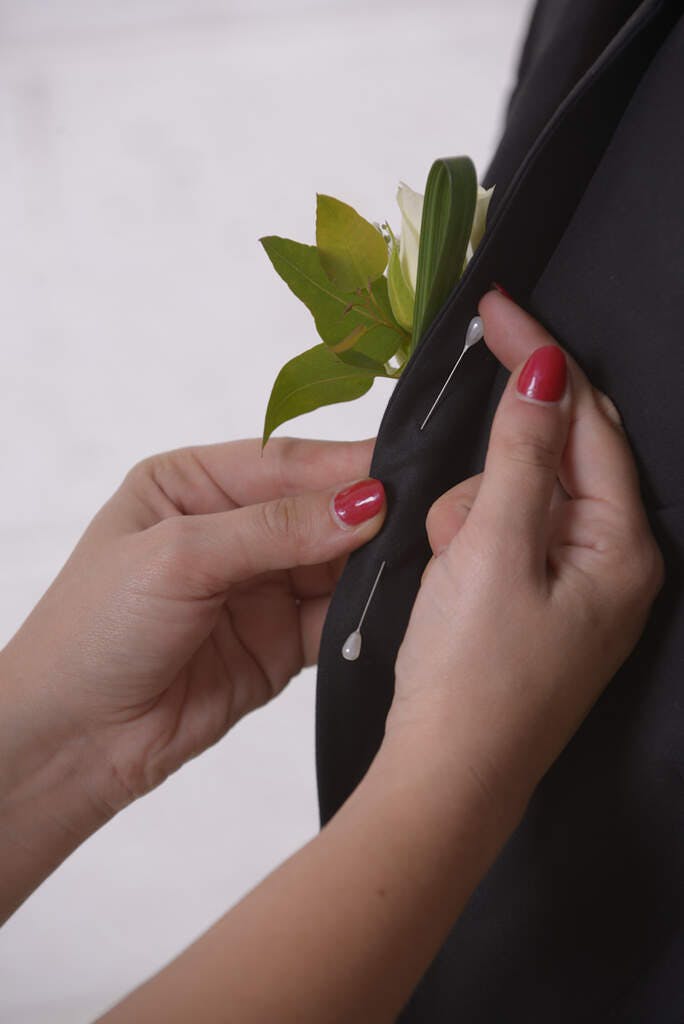
Start by placing the boutonnière exactly where you want to wear it. This should always be on the left lapel, as it is traditionally worn over the heart. It should be central in terms of its placement on the lapel, and close to the button hole, but many modern suits are not designed to hold a boutonnière in the button hole.
Using the boutonnière pins, place two pins through the stem from inside the lapel of the jacket, with one at the top and one at the bottom. Only push the pins through by a couple of centimetres or an inch, there is no need to push them as far as possible as you risk damaging your jacket and the flowers.
Step 8: Wear, look great and enjoy!

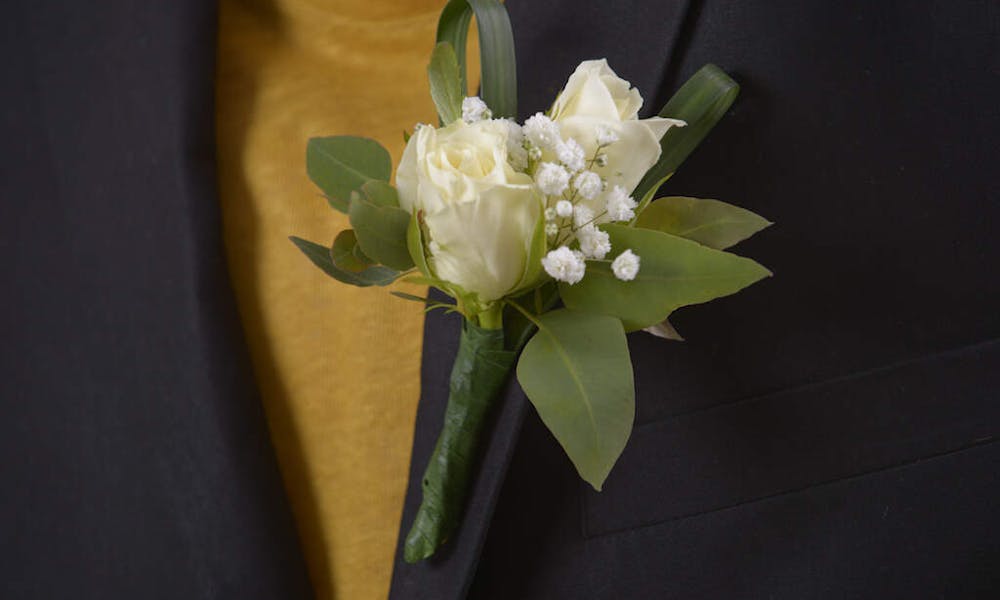
Most importantly of all, wear your boutonnière with pride and make sure that you have a great time, whatever the occasion! Take care of your boutonnière as the flowers are very delicate and can easily be damaged, so just be sure to make sure that you don’t forget that you are wearing it.
Thank you for reading our latest post in the DIY With Flowers series, where we will continue with more tutorials on how to build your own floral accessories and decorations, perfect for any special occasion, whether it is a spring party, a wedding or just for the fun of it!
